Technique of axillary vein access for pacemaker lead implantation
Axillary Vein Access
Overview
The other method of subclavian venous access is by puncturing the vein before it crosses the first rib. (i.e. puncturing the the proximal axillary vein.) The merits of this technique include is lack of lead crush and much reduced risk of pneumothorax. However this is a difficult technique compared to the above subclavian access technique and the key is to understanding anatomy and hands on experience. Axillary vein access is the recommended method for implanting leads
Note : Axillary vein access denotes any venous access lateral to the medial border of the first rib. From a semantics point of view – this also includes the extrathoracic part of the subclavian vein. Keeping in common use, axillary access is the preferred term as – extrathoracic subclavian vein access is a mouthful.
There are three approaches to puncture and access the axillary vein
- Fluroscopy guided low approach using the first rib
- Fluroscopy guided lateral approach via the rib cage margin
- Using ultrasound
Fluoroscopy guided low approach using the first rib as a landmark
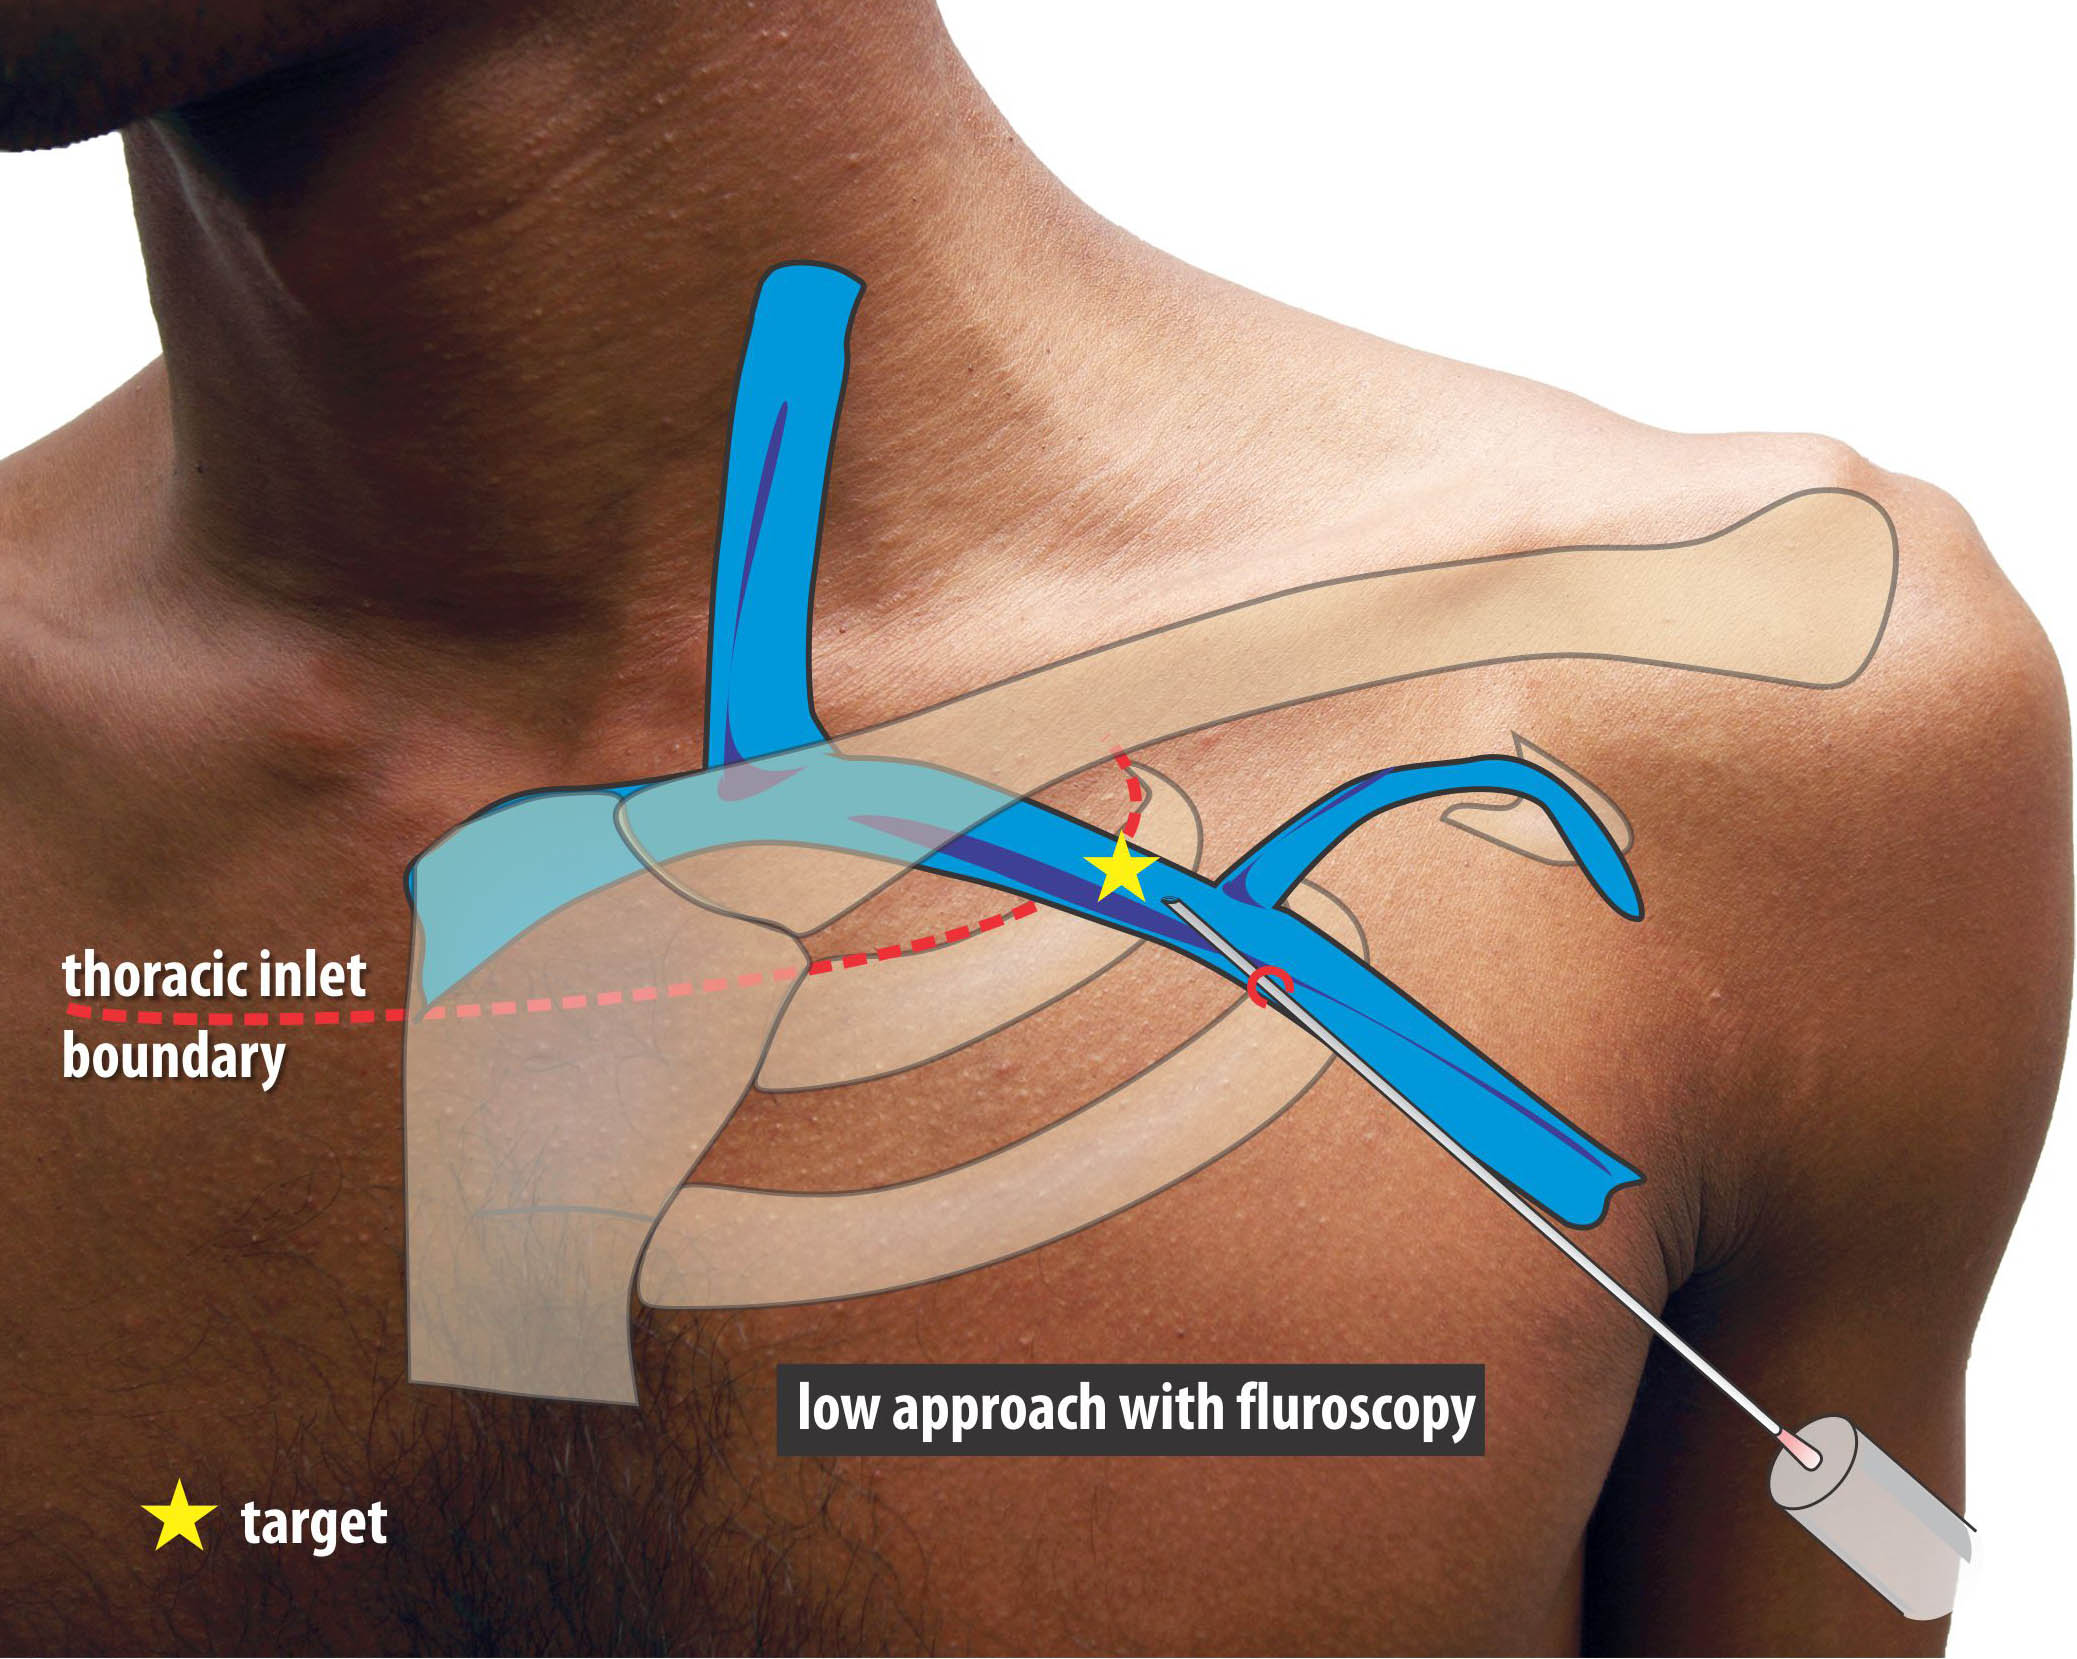
Figure : The first rib guided method. This approach is from below – aiming towards the root of the neck while observing the tip of the needle approaching the first rib at an angle about 45 degrees to the body surface. The target is the extra-thoracic component of the subclavian vein as it lies over the first rib. This is below the juncture where the clavicle crosses the first rib in AP view.
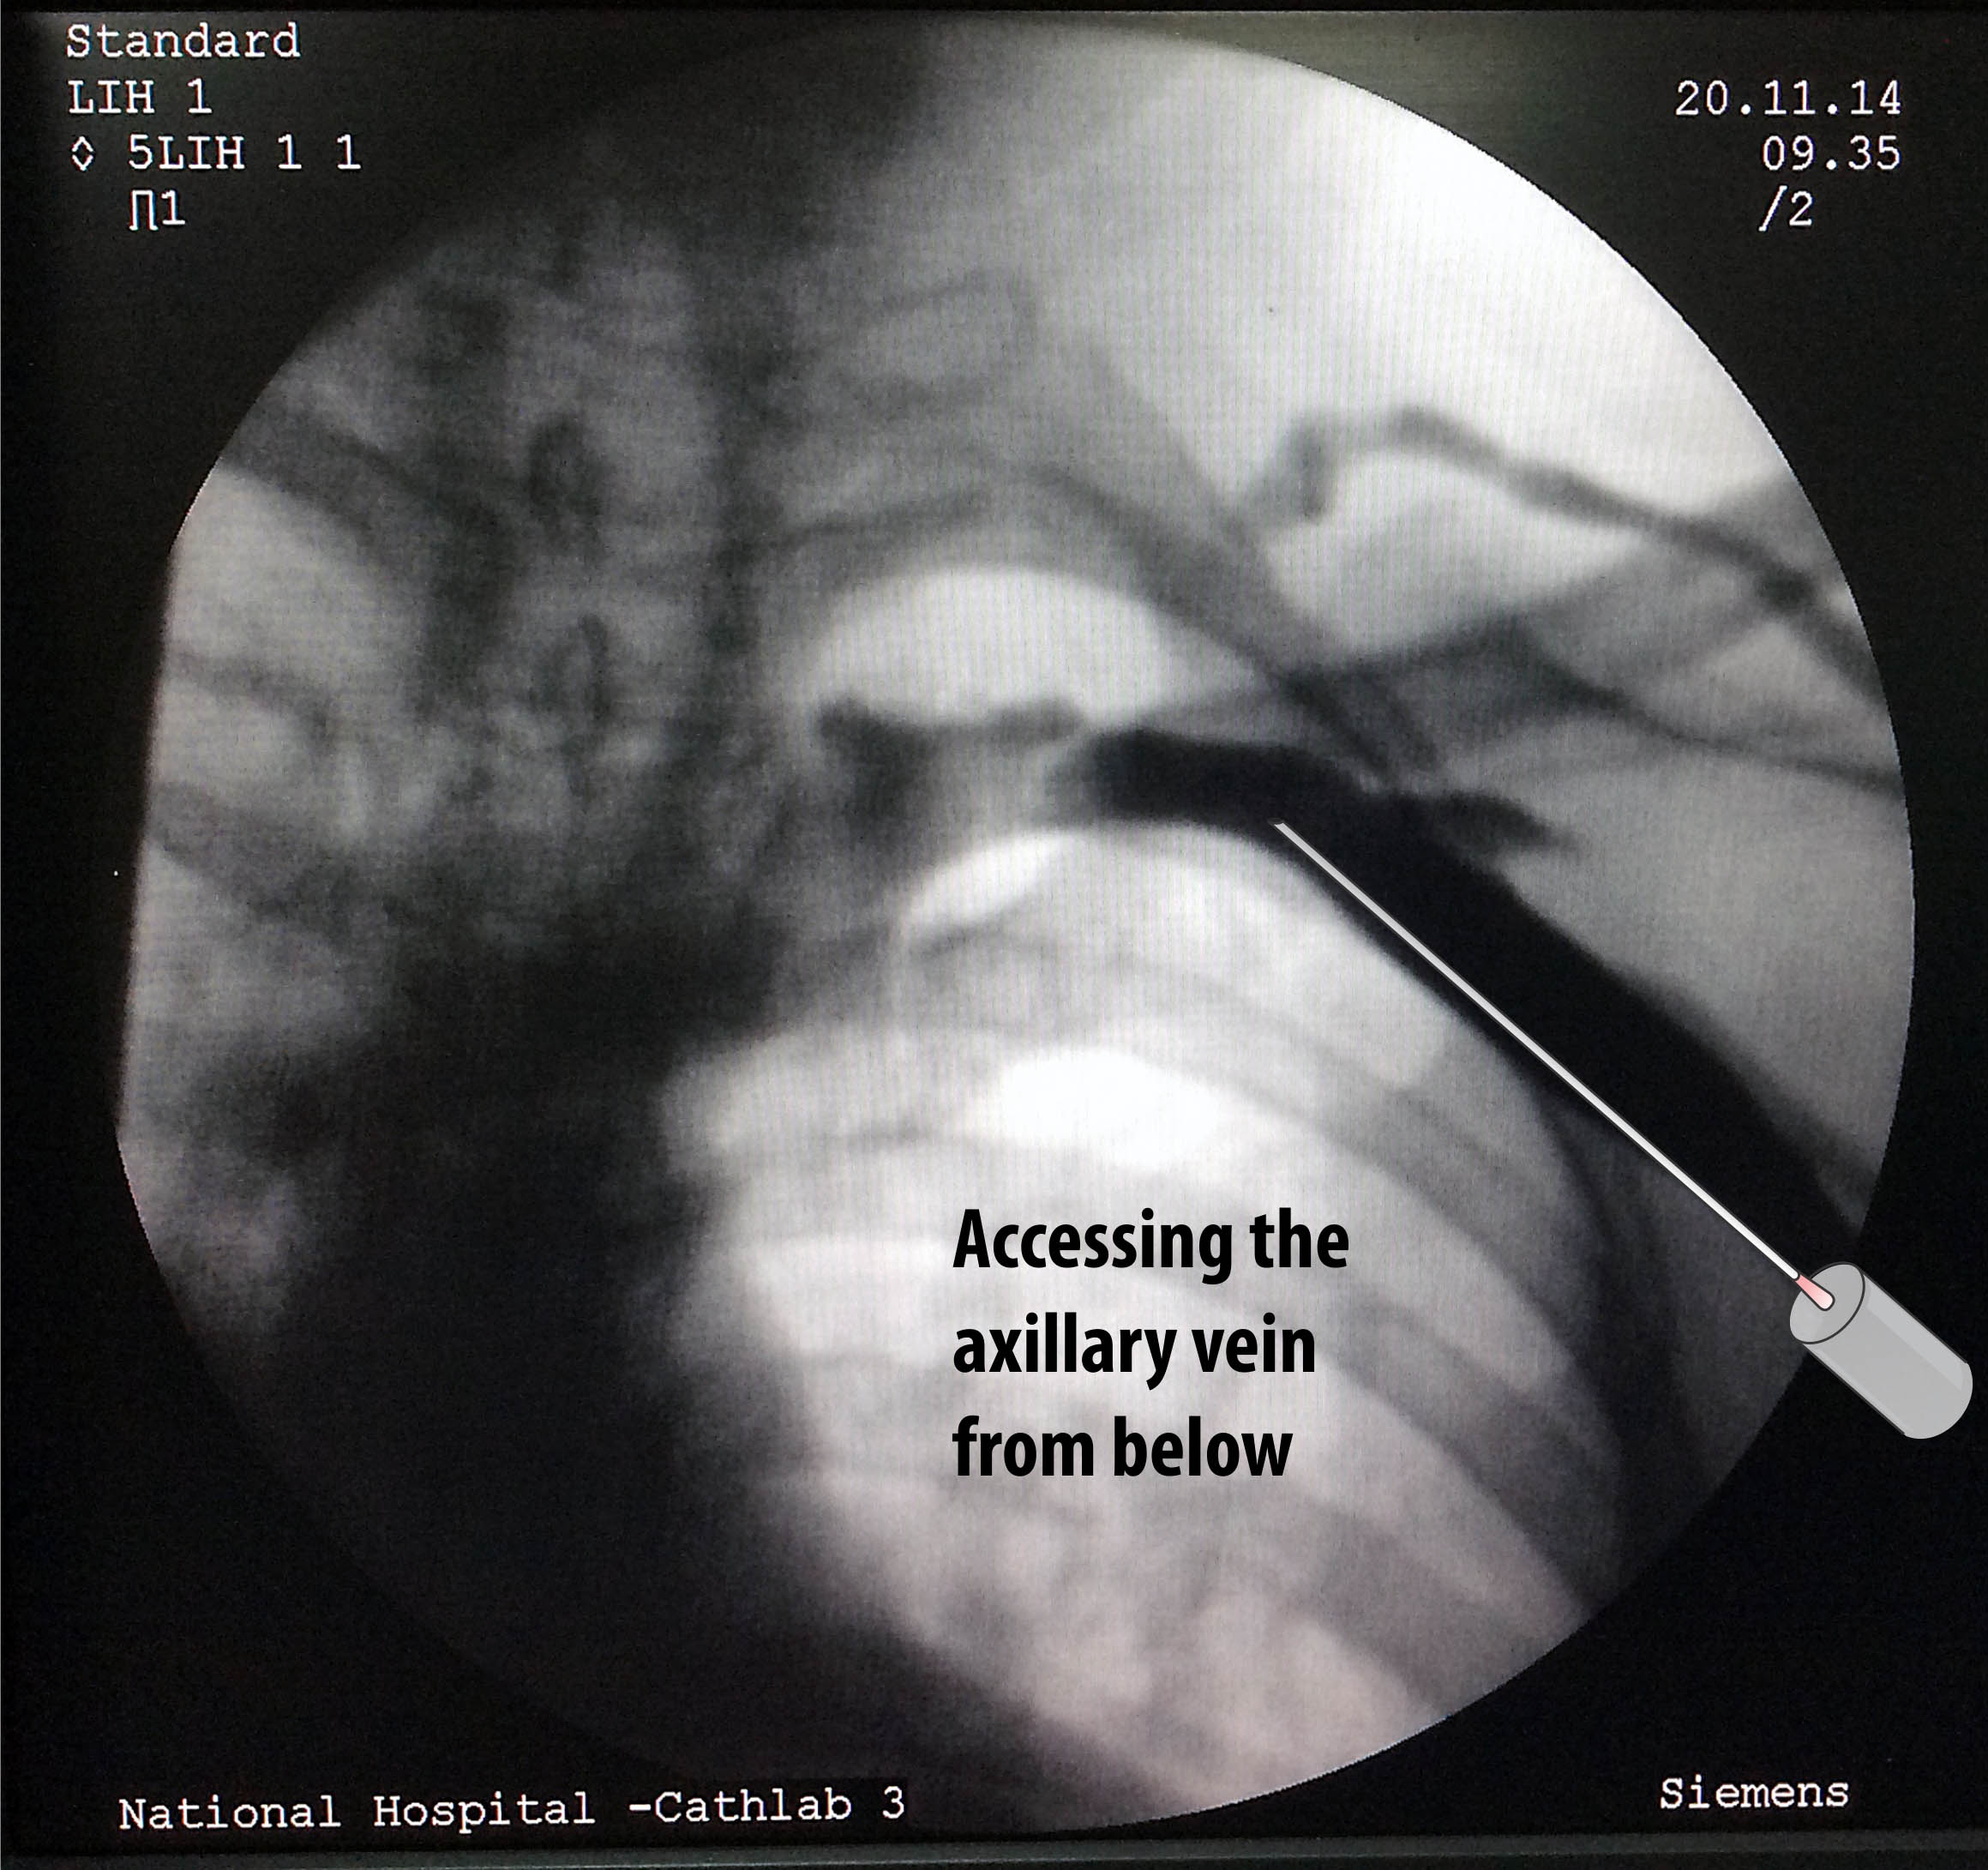
Figure : The first rib guided method. The same schematic as above but with fluroscopic background. Again the key is not to breach the medial border of the first rib
This approach is from below – aiming towards the root of the neck while observing the tip of the needle approaching the first rib at an angle about 45 degrees to the body surface. The target is the extra-thoracic component of the subclavian vein as it lies over the first rib. As shown in an example venogram, this is below the juncture where the clavicle crosses the first rib in AP view. While aspirating, the needle is gently advanced until the tip lies in the shadow of the first rib. If the needle pierces the vein, blood would be aspirated and the advancement is stopped. However if the vein is missed, the needle will continue deeper – but will hit the rib, which is the central safety feature of this technique to prevent a pneumothorax. However it is paramount not to advance the needle tip beyond the medial border of the first rib as one cannot assess the depth of the needle in AP view, when advancing it an angle.
If the bone is hit, then the vein is either anterior or posterior to the current needle plane. Th needle should be slightly withdrawn and slightly angulated to point either further posterior or further anterior on the rib and re-advance with aspiration. This is called “walking” the needle tip along the rib surface. If one does not hit the rib and it the needle tip is seeing going medial to the rib border, then must assume being in the wrong plane and re position the needle.
Usually a target angle of 45 degrees is sufficient but occasionally one may need a steeper angle about 60 degrees. Even in this situation the medial border rule applies
If a venogram has been not done and puncture has not been obtained after few dry fluorscopic passes, its advisable to do a venogram to assess anatomy. More than venous obstructions or anomalies, the most common culprit is a vein that is crossing slightly posterior or anterior along the first rib.
Occasionally one may hit the artery – especially in elderly patients – whose vein may be quite anterior. In this situation if possible save the fluroscopic position of the needle before withdrawing it – this becomes a useful reference point for the subsequent punctures. I.e now the needle should be more medial (i.e. closer towards the sternal edge) to gain access to the vein as the vein lies medial to the artery.
Even in the presence of a venogram, it is essential not to breech the medial (inner) border of the first rib because of the angle of the needle – one may be encroaching the pleura. A fluroscopic technique on assessing the depth is given in the next section on troubleshooting.
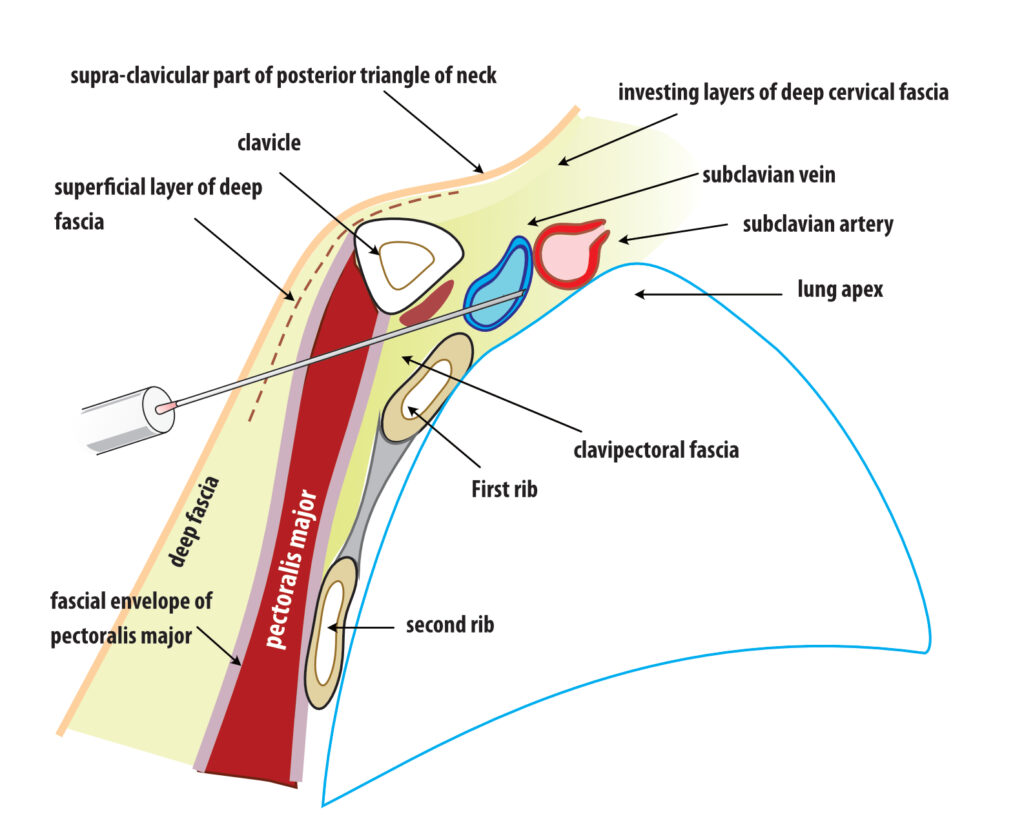
Figure: Subclavian access – cross section. The potential risk of breaching the pleura is obvious as the needle tip is not protected by any bony structure.
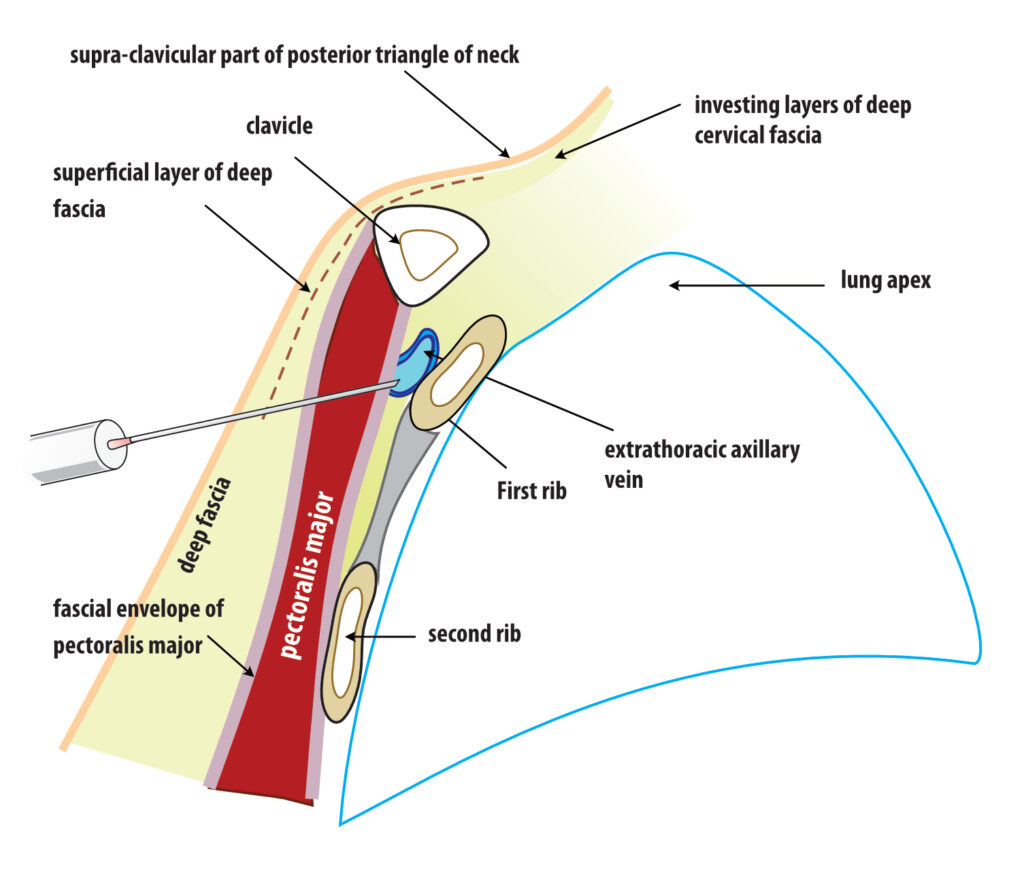
Figure: Extrathoracic subclavian / axillary vein access – cross section. The potential risk of breaching the pleura is prevented by the body of the first rib. It also gives a radiology landmark to stop advancing the needle too medially.
The key is not crossing the medial border of the FIRST rib in AP view
Fluroscopy guided lateral approach via the rib cage margin
The following method (described by : H. Burri et. al.,) is an elegant way of approaching the vein however there is a learning curve involved.. This technique relies on identifying a radiologic landmark and guiding the needle towards it. This approach has a minimal risk of pneumothorax as the needle is outside the pleural margin. To do this without venography, one practice by doing in patients with venograms to develop a mental picture where the vein is.
When one reviews venograms it will be seen that the axillary vein appears to lie across the rib cage at the confluence of the second and third ribs in a relatively constant fashion. This “edge” of rib cage formed by the second and third ribs will be the radiologic target for the needle.
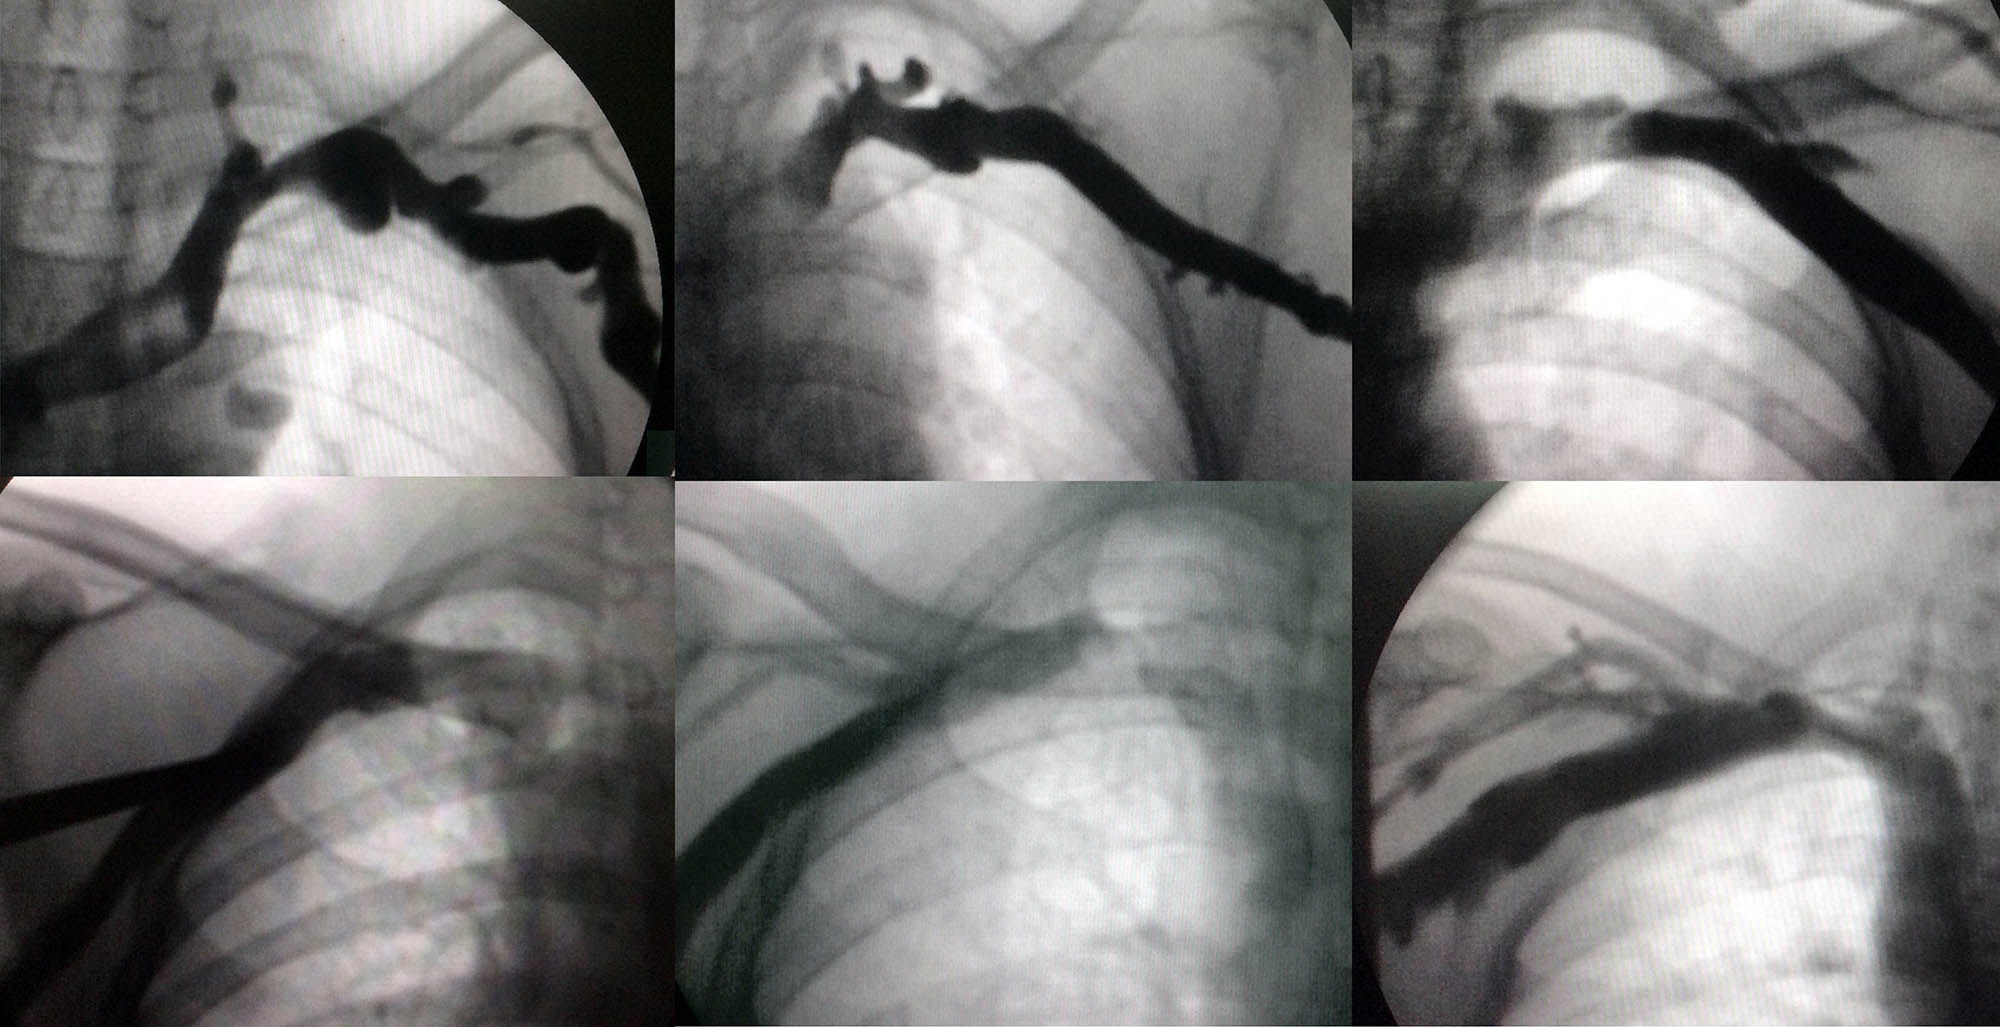
Figure : Relative constant nature of axillary vein overlying the confluence of the second and third ribs at the lateral border of the rib cage (in AP view)

Figure : Schematic of approaching the vein along rib cage margin
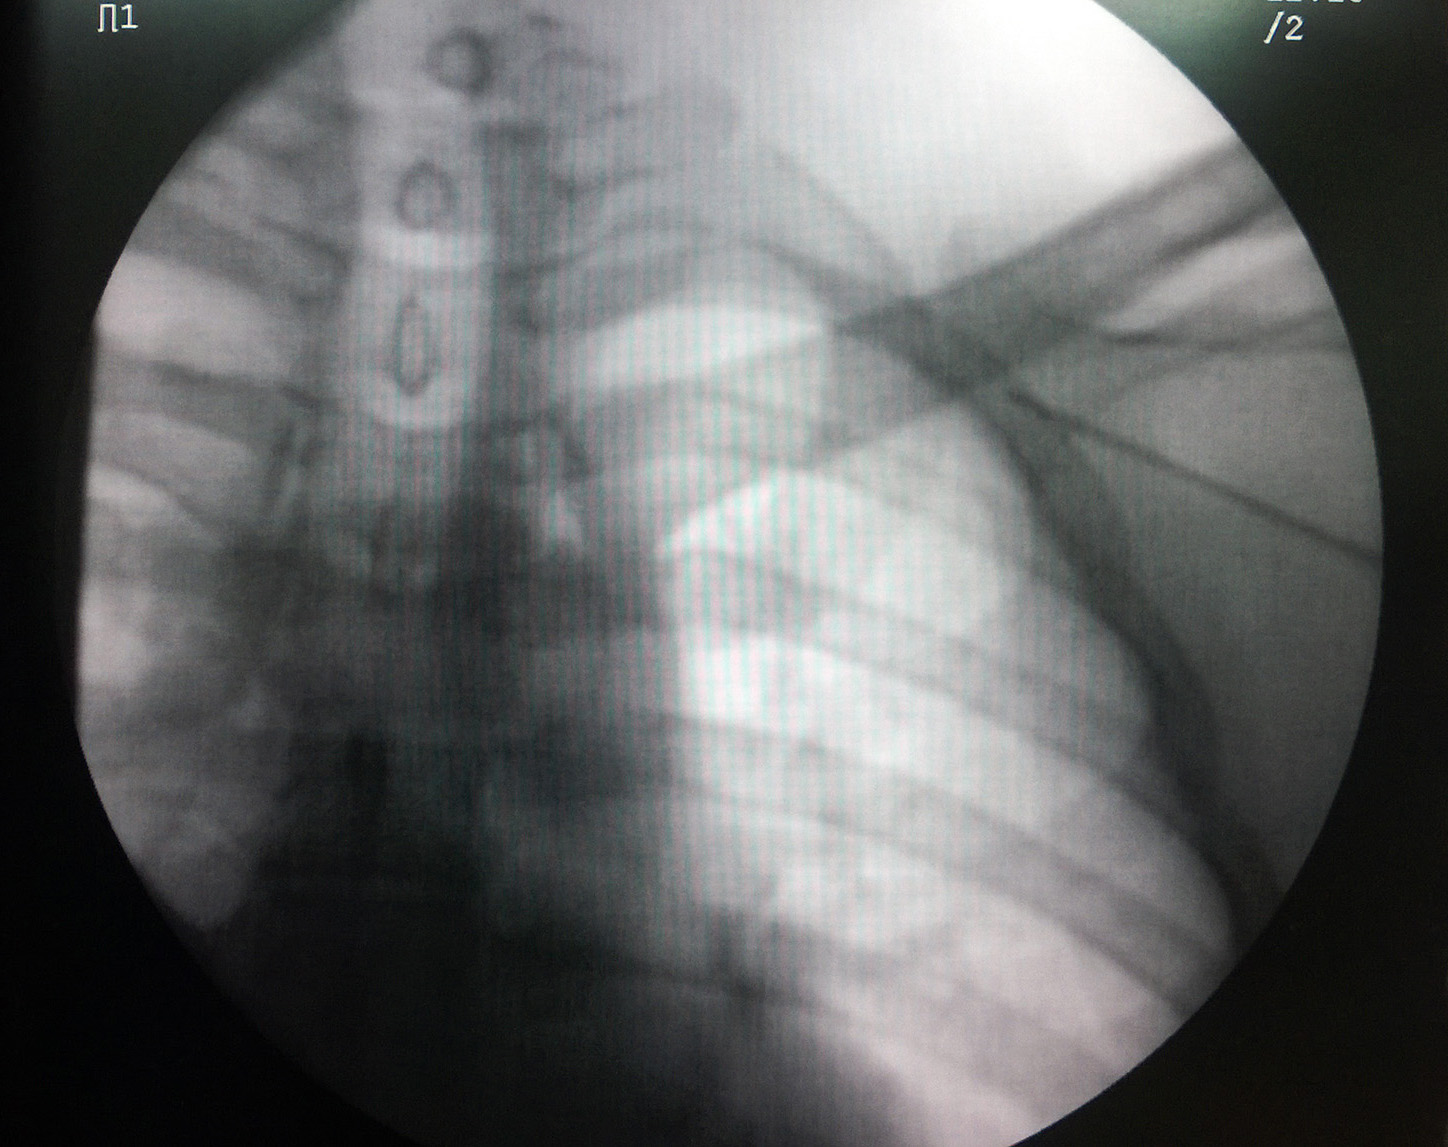
Figure : Needle Position when targeting this area. Note that the needle is virtually outside the rib border and aiming to skirt along the confluences of 2 and 3rd ribs. The depth of vein at this point is quite deep and one may have to achieve an angle of attach of about 45- 60 degrees to reach the vein. As long as the medial border of the rib margin is not breached, one can be safe from a pneumothrax.
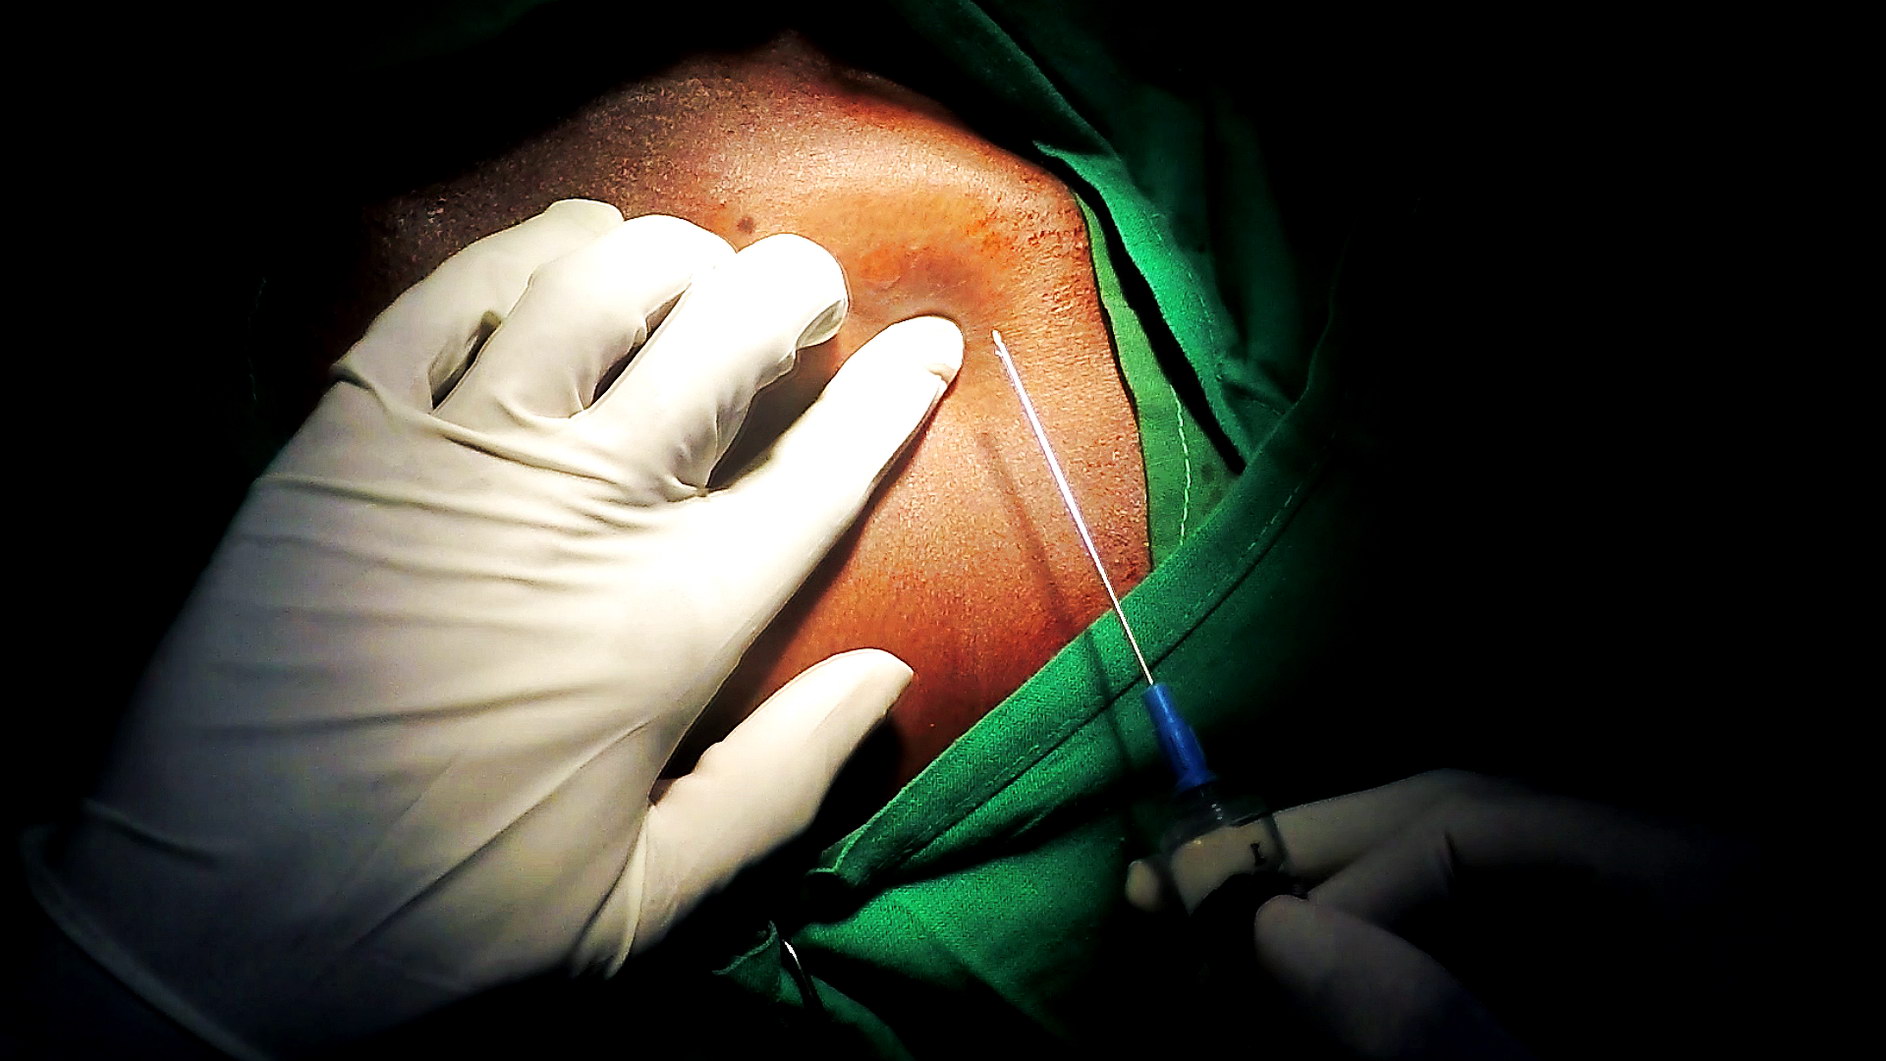
The technique is shown below in pictures of an acutal performance of a puncture, followed by a video clip
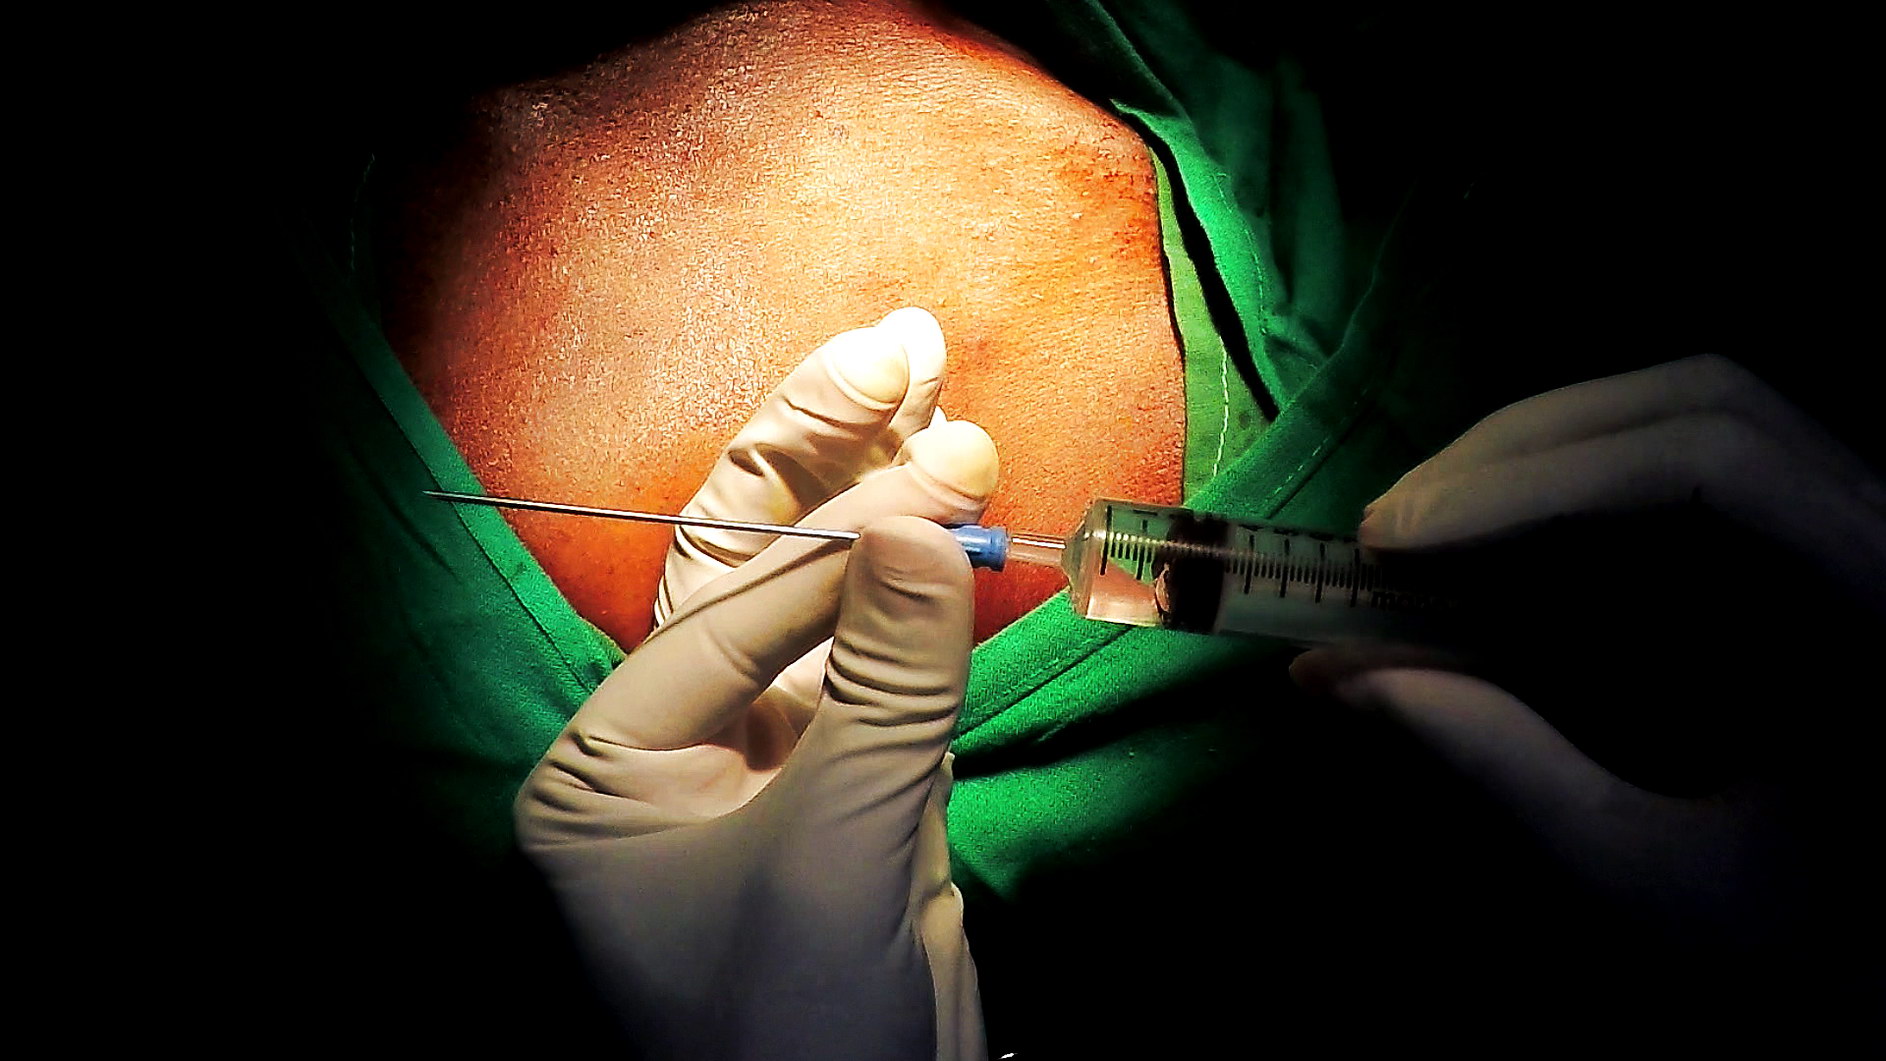
Check the needle attachment to the syringe. Needle should be loosely attached to a non-luer lock syringe. (If the attachment is too tight, you may loose access while struggling to release the syringe)
The hollow of the deltopectoral triangle is palpated at 1 – 2 finger-breadths below the junction of the lateral third and middle third of the clavicle. Needle enters most depressed part here
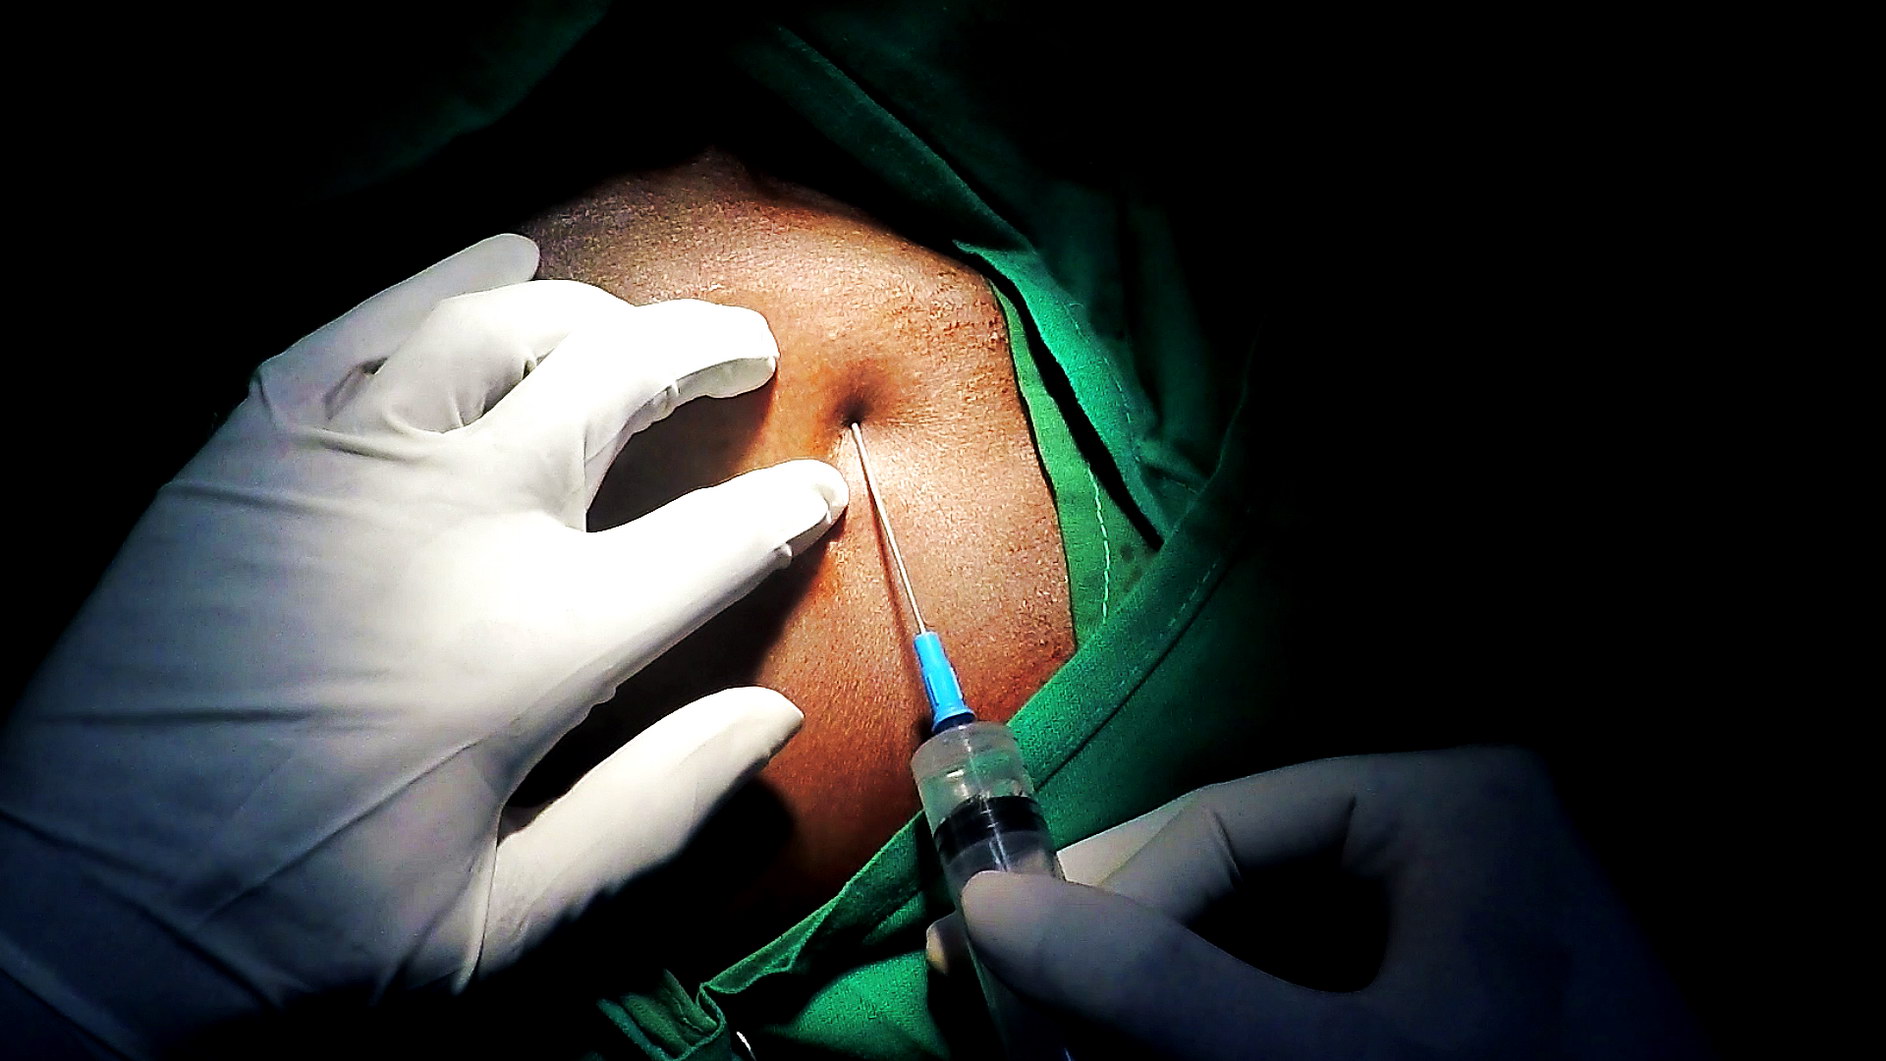
The needle is advanced at a skin angle of 45 degrees aiming towards base of the neck.

The tip of the needle is screened and should be in the shadow of the first rib and not pass it’s medial border . While entering the shadow laterally, one must take great care to advance the needle in tiny soft steps with continuous light suction until blood is aspirated
See text above on what to if blood is not aspirated at this point
Ultrasound guided access
If one has access to a vascular ultrasound probe, then the axillary access can be either performed entirely using with aid of ultrasound or facilitated to avoid or minimize the need of a venogram
Ultrasound guided direct access involves visualizing the vein and guide the needle to the vein while observing the tip of needle entering the vein. This requires a specific workflow and is described here